|
What to do
|
Notes
|
|
1. Start Microsoft Word. |
We will create a custom Student Certificate using a school logo. |
|
2. Open a blank document if one is not already open |
Choose File/New Document |
|
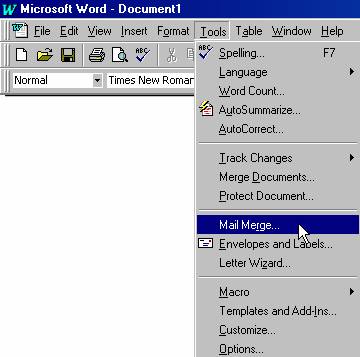
3. From the Tools menu, select Mail Merge… |
|
|
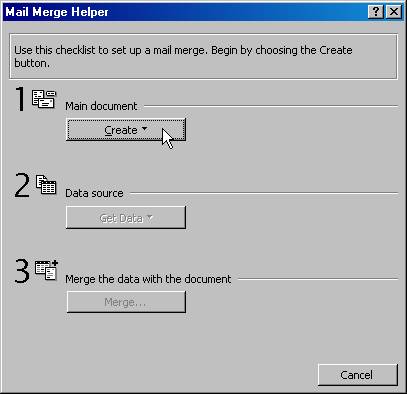
4. The Mail Merge Helper (Wizard) appears. |
|
|
5. The Mail Merge Helper has 3 steps |
Step 1 is CREATE new document |
|
6. Click CREATE |
|
|
7. Select Form Letters |
Form Letters are a way to create a page for every record in our data source. This means a page for each student record, for example. |
|
|
|
|
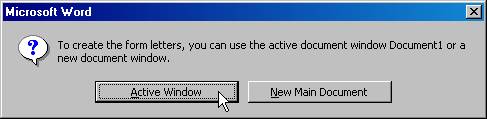
8. Next the wizard asks if you’d like to use the Active Window |
Click Active Window |
|
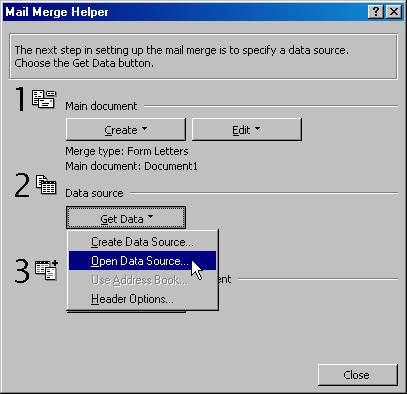
9. Click the GET DATA button. This is the second step in the wizard. |
|
|
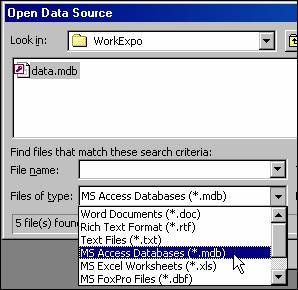
10. Navigate to the WorkExpo folder.
IMPORTANT NOTE! |
|
|
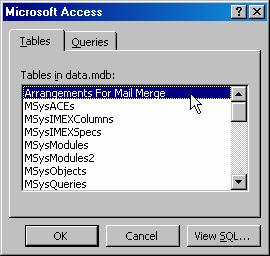
11. Word now creates a link to the Microsoft Access database file and displays its contents. |
|
|
|
|
|
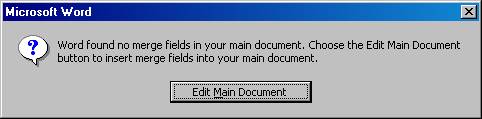
12. Because the main document is a new document Word displays this message. |
Click EDIT MAIN DOCUMENT |

|
13. The wizard disappears and we are returned to the main document |
|
|
|
|
|
14. Now the mail merge toolbar has appeared. |
We use this toolbar to perform the merge process. Run your mouse over the toolbar buttons to get acquainted with them. |
|
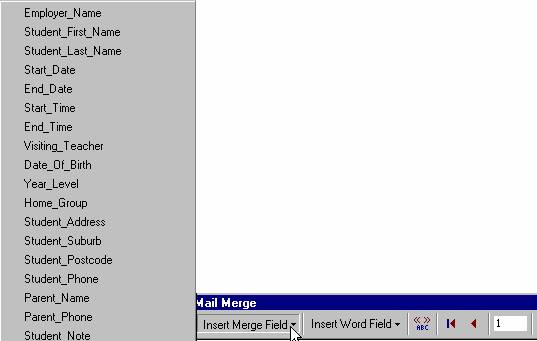
15. Click the INSERT MERGE FIELD button at the left of the toolbar. |
|
|
|
|
|
The fields from WORKEXPO are displayed in a list. Because there are many fields in WorkExpo this list is very long. Click on Student_First_Name. Word inserts that field into the Word main document. |
|
|
16. The field is shown enclosed in double brackets called CHEVRONS |
|
|
17. Press the space bar to create a space after the inserted field |
|
|
18. Click the INSERT MERGE FIELD button at the left of the toolbar again. |
|
|
|
|
|
19. This time insert the student’s last name. |
Click on the field called Student_Last_Name |
|
20. To VIEW the data that the fields represent you click the ABC button as shown below |
|
|
|
|
|
|
|
|
21. Click the NEXT RECORD (See above) button to view the name of the next student. |
Similar to the Student and Employer navigation controls in WorkExpo. |
|
22. You have now set up your main document. The next step is to create the merge itself. |
|
|
23. Finally the merge itself occurs. Click the |
This creates the third and final file in the merge process. |
|
|
|
|
24. Word now displays the results of the merge in a new document. |
This file can be saved or printed. Alternatively, you can simply click the “Merge to printer” button to produce the output of the merge directly to the printer. |
|
25. Save the main document for later re-use. |
This saves all merge information so that next time you won’t need to use the merge wizard. |
|
26. Check out some of the merge samples on the CD under the TRAIN folder. |
Or under the My Documents folder. |
|
|
|